This guide covers how galvanic corrosion develops in chillers, how to recognize it before it becomes a structural problem, and exactly how to repair it — step by step. It also addresses when repair is the right call versus when replacement becomes necessary.
Key Takeaways
- Galvanic corrosion attacks the tube sheet when dissimilar metals meet circulating coolant
- Warning signs include pitting at tube joints, discolored coolant, and rising energy consumption
- Repair follows three steps: abrasive blasting to bare metal, corroded area reconstruction, then non-conductive coating application
- Surface preparation is the single most critical step — coating over contaminated metal guarantees failure
- Scheduling proactive coating during planned downtime costs a fraction of emergency repair or full replacement
What Is Galvanic Corrosion in a Chiller System?
AMPP defines galvanic corrosion as an electrochemical process where two dissimilar metals in an electrolyte form a corrosion cell — the less noble metal becomes the anode and degrades preferentially while the more noble metal acts as the cathode and is protected.
In a chiller, that process maps directly to the tube sheet assembly:
| Galvanic Cell Element | Chiller Component |
|---|---|
| Anode (corrodes) | Steel or cast iron tube sheet |
| Cathode (protected) | Copper or brass tubes |
| Electrolyte | Circulating coolant or cooling water |
| Conductive return path | Direct metal-to-metal contact at tube joints |
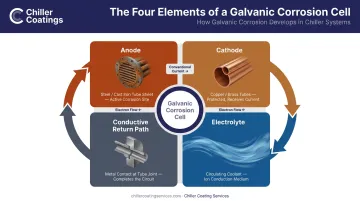
As confirmed by Johnson Controls' water-cooled chiller materials guide, standard chiller configurations pair carbon-steel tube sheets with copper or copper-nickel tubes — a combination that satisfies all four conditions for a galvanic cell every time the system runs.
Why Tube Sheets Are Particularly Vulnerable
The tube sheet sits at the junction where circulating coolant contacts both metals continuously. Unlike a pipe connection that might be partially insulated or intermittently exposed, the tube-to-tube-sheet interface operates under:
- Continuous electrolyte contact — coolant flows across the tube-to-sheet interface throughout every operating cycle
- Thermal cycling stress that opens micro-gaps at tube joints, accelerating metal loss with each start/stop sequence
- Infrequent inspection schedules — many tube sheets aren't examined closely until a chiller efficiency problem or leak forces the issue
By the time visible pitting or wall thinning appears, the steel has typically lost enough material that reconstruction — not just coating — becomes necessary to restore structural integrity at the tube joints.
Common Problems: How Galvanic Corrosion Damages Chiller Systems
Galvanic corrosion in chillers follows predictable patterns. Recognizing these early determines whether you're looking at a straightforward coating repair or a structural problem.
Problem 1: Pitting and Metal Loss at Tube Joints
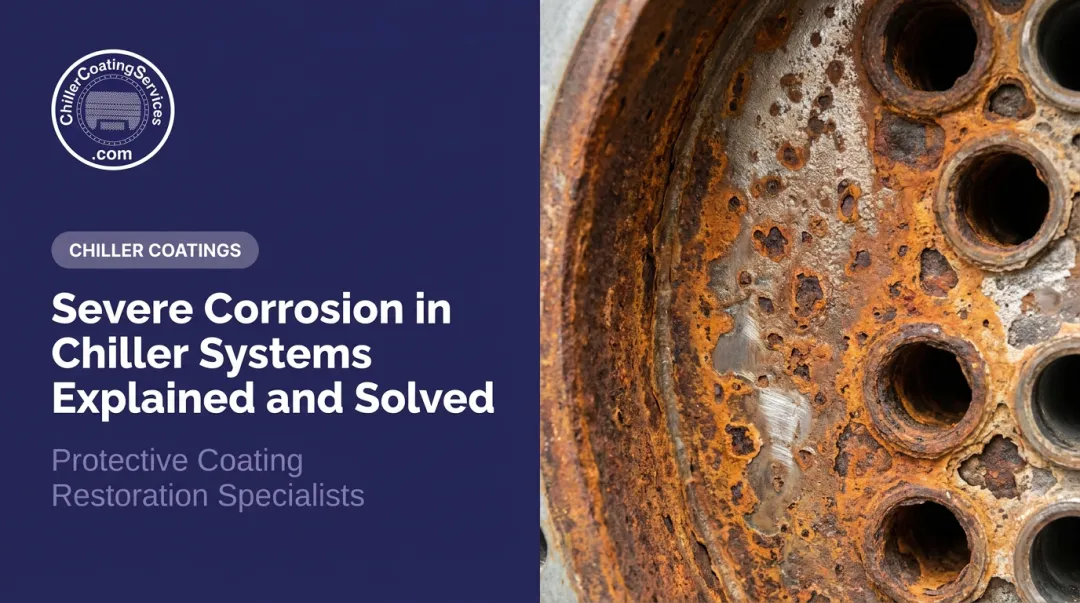
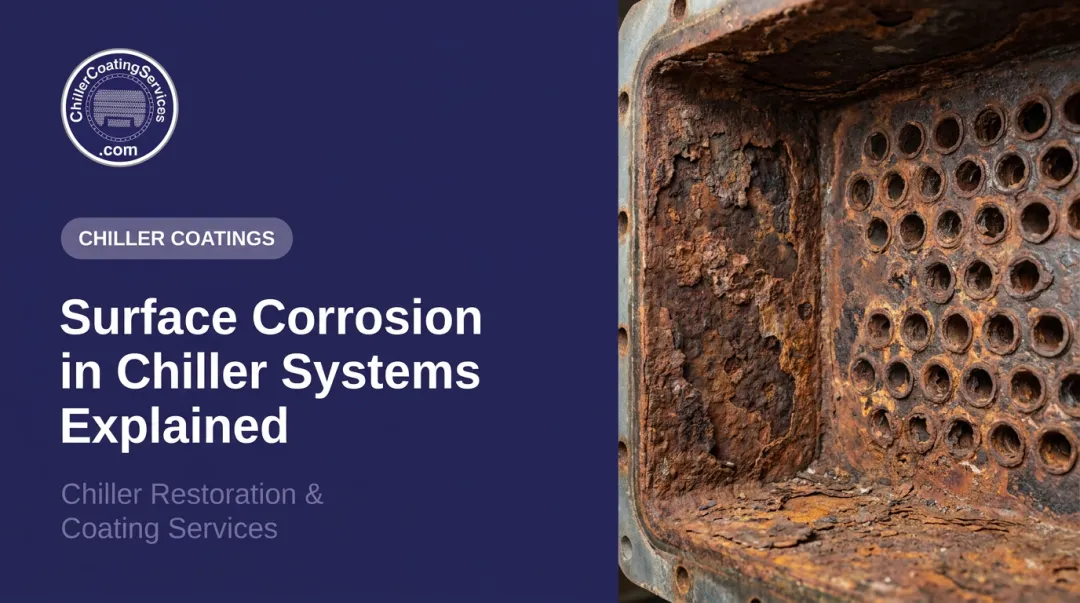
What you'll see: Visible pits, craters, or rough surface texture at the point where tubes enter the tube sheet. Reddish-brown or white powdery deposits are common at these joints.
What's happening: The steel tube sheet is acting as the anode in a galvanic cell with the more noble copper tubes (less reactive). Metal loss concentrates at the joint interface — the highest-current zone — producing the characteristic pitting pattern.
Problem 2: Coolant Contamination and Leakage
What you'll see: Discolored coolant, metallic particles in the fluid, unexpected drops in coolant level, or visible weeping at tube joints.
What's happening: Advanced pitting has compromised the tube-to-tube-sheet seal. Carrier's maintenance documentation notes that tube erosion can produce water leaks, and water mixing with refrigerant-side oil creates secondary damage including compressor bearing wear — a failure chain that starts with a small seep and ends with major mechanical damage.
Problem 3: Reduced Efficiency and Higher Energy Consumption
What you'll see: Higher energy draw for the same cooling load, longer run times, elevated condensing temperatures, reduced tonnage output.
What's happening: Corrosion deposits and surface roughness increase inlet turbulence and degrade heat transfer. Trane's automatic tube cleaning brochure found that just 0.6 mm of condenser tube scale reduces heat-transfer efficiency by 34% and raises chiller energy consumption by 21%. That's a significant operating cost penalty from surface degradation alone.
Problem 4: Weakened Tube-to-Tube-Sheet Joint Strength
What you'll see: Tubes that move with less resistance than expected, micro-gaps visible under inspection lighting, or increased vibration at the tube bundle.
What's happening: Metal loss at the joint interface reduces the mechanical bond between tube and tube sheet. As the joint weakens, tubes shift under operating pressure — accelerating corrosion further and creating pull-out risk. Left unaddressed, this leads to structural failure of the tube bundle.
How to Repair Galvanic Corrosion in a Chiller: Step-by-Step
One point before the steps: coating over active corrosion or inadequately prepared metal is the most common reason chiller tube sheet repairs fail. Correct sequencing isn't optional.
Step 1: Assess and Document the Damage
Conduct a thorough visual inspection of the tube sheet face, all tube-to-tube-sheet joints, and surrounding surfaces. You're looking for:
- Pit depth and surface area affected
- Active leakage or weeping at joints
- Evidence of tube looseness or movement
- Correlation between physical damage and operational symptoms (efficiency loss, coolant condition, alarms)
Photograph everything before any work begins. This baseline documentation supports repair scope decisions and, for regulated facilities like hospitals and manufacturing plants, feeds directly into compliance records.
Step 2: Prepare the Surface to Bare Metal
This is the most critical step in the entire repair.
- Cork all tubes before any surface preparation begins. Blast media, debris, and moisture inside the tube bundle create secondary damage that compounds the original problem.
- Abrasive blast the entire tube sheet surface to a white metal finish — SSPC-SP 5 / NACE No. 1 standard — with an anchor profile as specified by the coating product's technical data sheet. This cleanliness level means no visible oil, rust, mill scale, oxides, or contamination without magnification.
After blasting, remove all residue and inspect under adequate lighting. Any remaining contamination must be addressed before proceeding.
Step 3: Rebuild Damaged Metal and Restore the Tube Sheet
Pits and eroded areas around tube joints must be filled and restored to a flush surface profile before any coating is applied. This step is often skipped when repairs fail prematurely.
Use an appropriate epoxy-based or ceramic-filled metal repair compound, applied per the product's technical data sheet. Pay particular attention to tube-to-tube-sheet joint areas — this is where metal loss is deepest and where the structural bond between tube and tube sheet needs to be restored. Allow full cure before proceeding to coating.
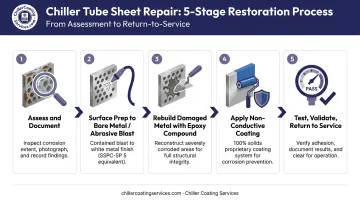
Chiller Coating Services builds this reconstruction into their standard three-step process. In documented cases, restoring metal thickness before coating has increased tube-to-tube-sheet push-out strength by over 1,000 pounds.
Step 4: Apply a Protective Non-Conductive Coating
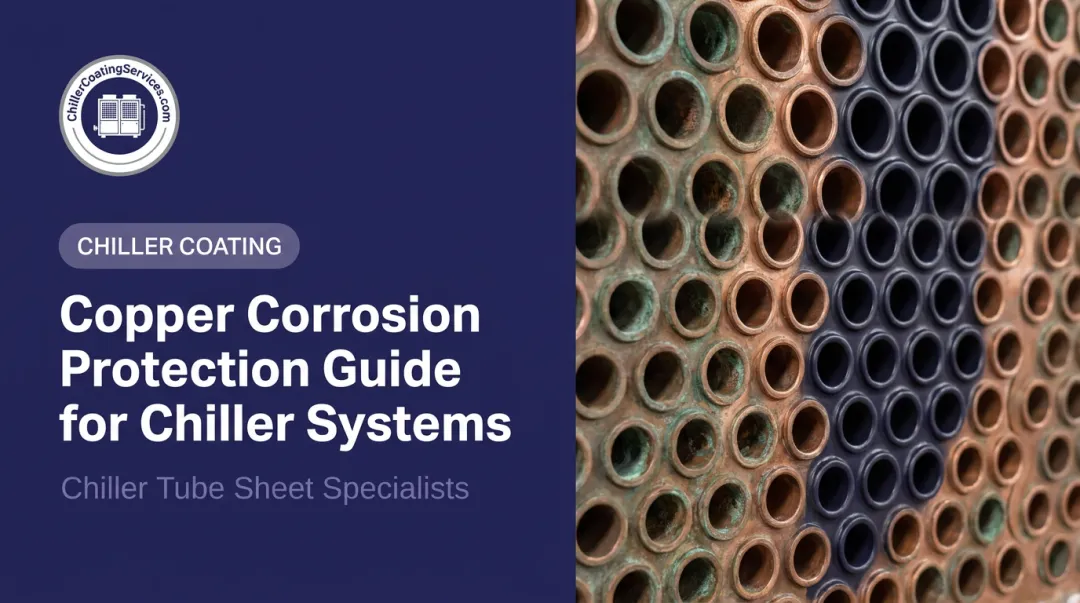
Apply a minimum of two coats of a fluid-applied ceramic or epoxy-based coating formulated for immersion service. The coating's critical function is electrical isolation: a non-conductive barrier that breaks the circuit between the tube sheet and tubes, cutting off the galvanic cell at its source.
Two-coat systems with contrasting colors add a practical maintenance advantage. When the topcoat wears through during future inspections, the base coat color becomes visible, signaling that recoating is needed before bare metal is exposed. Routine inspection becomes an early warning system.
Ensure full coverage at tube entry points and edges. These high-stress zones are where coating holidays and early film failure concentrate.
Chiller Coating Services applies a proprietary 100% solids epoxy coating system over white metal blast surfaces. Unlike solvent-based products, a 100% solids formulation delivers maximum film build per coat with no flash-off and no shrinkage during cure, producing a stronger finished film. Quick-cure technology keeps coating-related downtime within planned maintenance windows.
Step 5: Test, Validate, and Return to Service
After full cure:
- Remove all tube corks and verify no residue remains inside tubes
- Perform a pressure test or operational check to confirm joint integrity and no leakage
- Monitor performance over the first operating period — compare energy consumption, coolant condition, and output against pre-repair baselines
- Document the completed repair: coating product, surface prep method, application date, and photographs for future maintenance reference
Repair vs. Replace: How to Make the Right Call
The right call depends on four factors:
- Severity of metal loss and pitting depth
- Structural integrity of the tube sheet
- Chiller age relative to design life
- Cost comparison between coating repair and tube sheet or full chiller replacement
When Repair Is the Right Answer
Coating-based repair is appropriate when:
- Pitting is surface-level or moderate in depth
- Tube-to-tube-sheet joints retain mechanical integrity
- No active leakage is present
- The chiller is within a reasonable service life window
FacilitiesNet's chiller evaluation guidance suggests replacement often makes more sense after 15-20 years, and flags repair costs exceeding 50% of replacement cost as a general trigger for reconsideration. Within those parameters, a professional coating repair is a fraction of replacement cost — and can add years of serviceable life to equipment that still has structural integrity.
When Replacement or Engineering Review Is Warranted
Escalate to a structural engineer or consider replacement when:
- Tube sheet metal loss has compromised structural thickness beyond what reconstruction can restore
- Multiple tubes show pull-out risk under normal operating pressure
- Coolant contamination has damaged internal components (compressor, bearings, refrigerant circuit)
- The unit has exceeded its expected service life and is accumulating compounding failures across systems
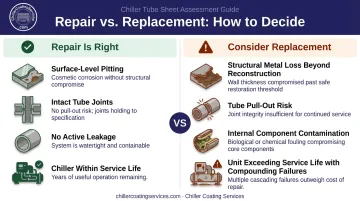
When two or more of these conditions apply together, a professional condition assessment — not another repair cycle — is the right next step.
How to Prevent Galvanic Corrosion in Chiller Systems
The U.S. Department of Energy's Operations & Maintenance Best Practices Guide estimates that preventive maintenance programs save 12-18% compared to reactive maintenance across facility equipment — a benchmark that reflects the compounding costs of unplanned failures and emergency mobilization. For chiller systems, that gap widens: corrosion-related tube sheet failures carry repair costs that dwarf what proactive coating work runs.
For chiller tube sheets specifically, prevention centers on three practices:
1. Apply a non-conductive protective coating proactively, before visible corrosion develops. A properly applied coating adds an insulating layer that breaks the electrical circuit between dissimilar metals, eliminating the galvanic cell before it starts consuming the tube sheet. Professional application ensures the coating bonds to the substrate and withstands long-term immersion, chemical exposure, and thermal cycling.
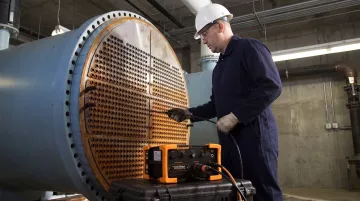
2. Incorporate tube sheet inspection into scheduled maintenance intervals. Each inspection should:
- Document current coating condition
- Check for color breakthrough in dual-coat systems
- Flag any areas of coating loss for spot repair before bare metal is exposed
Johnson Controls specifies annual inspection and maintenance of ceramic tube sheet coatings. Trane recommends annual condenser tube inspection for fouling and nondestructive eddy-current testing at three-year intervals.
3. Partner with a specialist for multi-chiller or aging equipment portfolios. For facilities managers overseeing chillers in hospitals, schools, manufacturing plants, or commercial buildings across New England and New York, surface preparation, coating selection, and application all need to meet the standards required for long-term service life.
Chiller Coating Services has worked with these facility types across the region for over 40 years. Documented service records support compliance requirements for healthcare, industrial, and data center environments.
Frequently Asked Questions
How do you repair galvanic corrosion?
Effective repair follows three steps: abrasive blasting to bare white metal, rebuilding lost metal with an epoxy repair compound, and applying a non-conductive coating to interrupt future galvanic activity. Skipping any step compromises the result.
How can galvanic corrosion be prevented?
Prevention means eliminating one element of the galvanic cell. The most practical approach is applying a non-conductive coating that electrically isolates the dissimilar metals from each other and from the coolant. Scheduled inspections then catch coating wear before bare metal is exposed — keeping the protective barrier intact.
What speeds up galvanic corrosion?
Key accelerants include a large cathode-to-anode surface area ratio (a small exposed steel area adjacent to large copper tube surfaces concentrates corrosion current), high electrolyte conductivity from warm or mineral-rich cooling water, and elevated temperature. All of these conditions are routine inside operating chiller systems.
What are the signs of galvanic corrosion in a chiller?
Primary indicators are visible pitting or metal loss at the tube sheet face, white or rust-colored deposits at tube-to-tube-sheet joints, coolant discoloration or unexpected fluid loss, and declining chiller efficiency or rising energy consumption without an obvious mechanical cause.
Can galvanic corrosion cause a chiller to fail completely?
Yes. Unaddressed corrosion progresses to tube pull-out, loss of joint integrity, and coolant or refrigerant leakage, which can require full tube sheet replacement or chiller decommissioning. Early detection and professional coating repair prevent failure at a fraction of that cost.