The problems facilities managers encounter most often are predictable: tube sheet corrosion, fouling, tube erosion, and gasket failures. Each one has a repair pathway. The challenge is knowing which pathway applies, and when repair stops making sense.
This guide covers how to identify heat exchanger problems, a step-by-step repair process, the repair-vs.-replace decision, and how to prevent failures from recurring.
Key Takeaways
- Corrosion, fouling, erosion, and gasket failures account for the majority of heat exchanger problems
- Most failures are repairable when caught early—cleaning, retubing, and protective coatings all extend service life
- Repair makes sense for localized damage; widespread or recurring failures typically warrant replacement
- Surface preparation quality is the single biggest factor in repair durability
- Preventive maintenance costs a fraction of unplanned downtime: industrial facilities lose $50 billion per year to unplanned outages, per a 2022 Emerson study
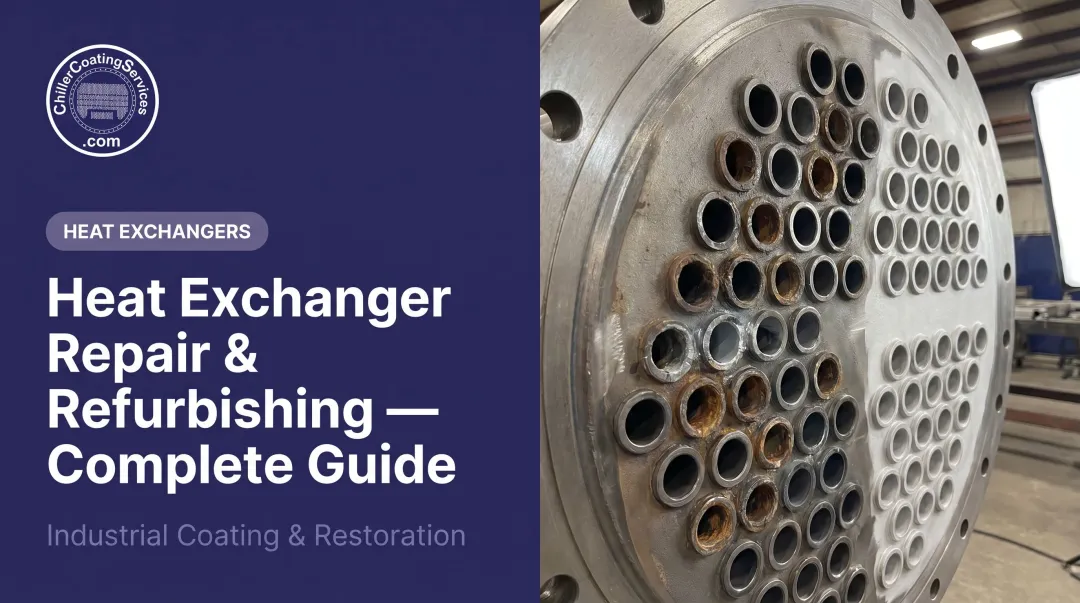
What Is a Heat Exchanger?
A heat exchanger transfers thermal energy between two fluids without mixing them. That single function sits at the center of HVAC chillers, power generation, chemical processing, and dozens of other industrial applications.
The core components of a shell-and-tube unit include:
- Tube bundle – where heat transfer occurs
- Tube sheets – hold the tubes in place at each end
- Shell – contains the shell-side fluid
- Baffles – direct shell-side flow across the tube bundle
- Gaskets and seals – maintain fluid separation in plate exchangers
Each component degrades at its own rate due to thermal cycling, chemical exposure, and fluid dynamics. Shell-and-tube heat exchangers can last 25 years or more with proper maintenance—some exceed 30 years. Even minor degradation at one component—particularly the tube sheet—can allow fluid contamination, reduce thermal efficiency, and trigger unplanned downtime that dwarfs the cost of early intervention.
Common Heat Exchanger Problems
Most failures follow predictable patterns tied to operating environment and maintenance history. Early identification keeps repair costs manageable.
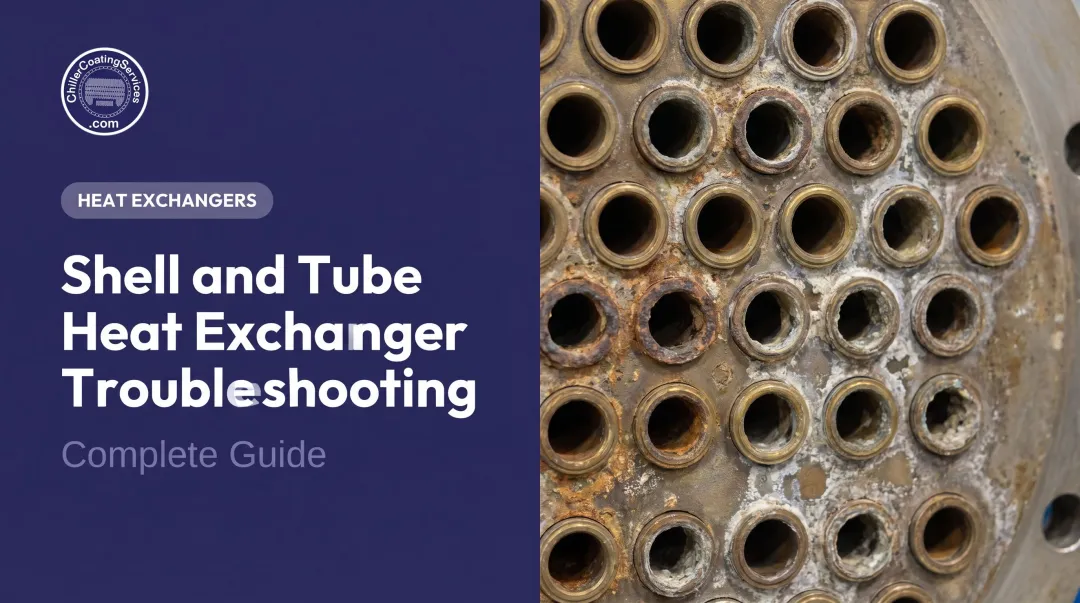
Tube Sheet Corrosion and Cracking
Symptoms:
- Fluid leakage across the tube sheet
- Visible metal loss or pitting
- Weakened tube-to-tube-sheet joints
- Contamination between fluid streams
Cause: Galvanic corrosion occurs when dissimilar metals are electrically connected in an electrolyte—the exact condition at tube-to-tube-sheet junctions in chiller systems. Peer-reviewed research confirms corrosion as the most common cause of heat exchanger failure, with crevice and pitting mechanisms frequently implicated in shell-and-tube failures. The absence of a protective coating leaves bare metal continuously exposed to oxygenated cooling water and anti-scale chemical treatments, accelerating damage.
Fouling and Scaling
Symptoms:
- Reduced heat transfer efficiency
- Increased energy consumption
- Higher-than-expected operating temperatures
- Elevated pressure drop across the unit
Cause: Mineral scale from calcium and magnesium ions, biological fouling (biofilm), rust, and process deposits accumulate on heat transfer surfaces, creating an insulating layer that inhibits thermal exchange. Fouling penalties are estimated at approximately 0.25% of GDP in industrialized countries, and the U.S. Department of Energy estimates industrial fouling causes roughly 2.9 Quads per year in energy losses.
Tube Erosion and Wall Thinning
Symptoms:
- Pinhole leaks and fluid mixing between streams
- Reduced pressure integrity
- Accelerated failure at tube inlets
Cause: High-velocity flow—especially with suspended particles or turbulent inlet conditions—removes protective surface layers from tube walls over time. Research documents extensive localized erosion-corrosion at internal inlet tube surfaces as a distinct failure mode separate from generalized corrosion.
Gasket and Seal Failures (Plate Exchangers)
Symptoms:
- External fluid leaks or cross-contamination between process streams
- Visible seepage around plate pack edges
Cause: Thermal cycling, chemical incompatibility with elastomer materials, age-related degradation, or improper reassembly during prior maintenance all contribute to gasket failure. Similar seal degradation can also occur at flanged connections on shell-and-tube units.
How to Repair a Heat Exchanger: Step-by-Step
Attempting repairs without confirming the root cause produces repeat failures. Every effective repair starts with diagnosis.
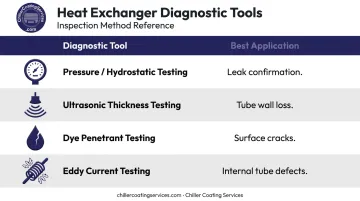
Step 1: Inspect and Diagnose
Begin with a visual inspection—document the location, extent, and type of damage. Then select diagnostic tools appropriate to the suspected failure:
| Tool | Best For |
|---|---|
| Pressure / hydrostatic testing | Confirming leaks; ASME/TEMA standards require shell and tube sides tested separately |
| Ultrasonic thickness testing | Measuring tube wall loss and metal thinning |
| Dye penetrant testing | Surface-breaking cracks in accessible metal |
| Eddy current testing | Internal tube defects (corrosion, pitting, erosion) without tube removal |
Also review operating history: when symptoms first appeared, any performance deviations, recent operational changes, and fluid chemistry records. Context often points directly to the failure mechanism.
Step 2: Clean the Heat Exchanger
Choose the cleaning method based on fouling type:
- Chemical cleaning (acid or alkaline solutions) – for mineral scale and biological fouling
- Mechanical cleaning (hydrojetting, brushes) – for heavy particulate or corrosion deposits
- Abrasive blasting to white metal finish – required before any coating or composite repair work
Residual contamination prevents coating adhesion and causes premature failure — no coating system performs well over a dirty surface. Chiller Coating Services performs both chemical cleaning and contained abrasive blasting on-site, with technicians trained to achieve the white metal finish that ensures long-term coating performance.
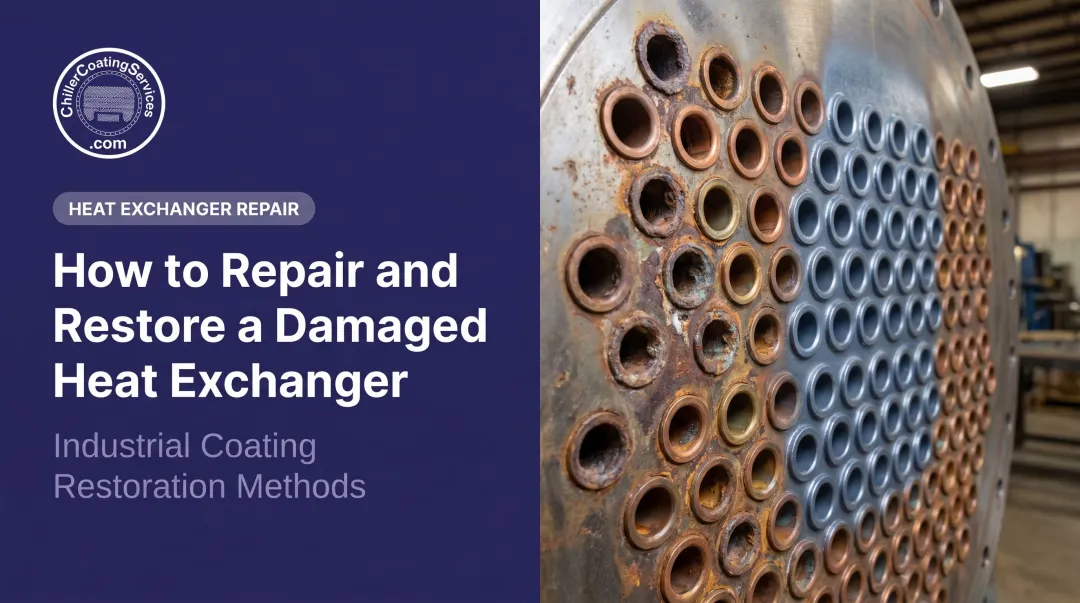
Step 3: Repair the Damaged Components
Tube sheet corrosion and cracking:
- Blast surfaces to a clean white metal finish to remove all corrosion products
- Rebuild pitted or eroded areas to restore the original surface profile
- Apply a protective 100% solids coating system to the tube sheet, tube ends, and water box
The 100% solids formulation used by Chiller Coating Services is engineered specifically for corrosion-prone metal surfaces. Key properties include:
- Contains no VOCs and bonds directly to bare metal
- Prevents galvanic corrosion at tube-to-tube-sheet junctions
- Reduces inlet turbulence for improved flow efficiency
- Withstands long-term immersion and resists a range of chemicals
- Has demonstrated tube-to-tube-sheet push-out strength increases of over 1,000 pounds in some cases
These characteristics make it well-suited for condenser-side components continuously exposed to cooling tower water.
Tube failures:
- Plug isolated failed tubes as a short-term fix to restore pressure integrity
- For widespread tube degradation, professional retubing with compatible alloy materials is the appropriate solution; retubing avoids full replacement and cuts procurement lead time
Gasket or seal failure (plate exchangers):
- Disassemble the plate pack
- Clean and inspect individual plates for corrosion or mechanical damage
- Replace worn elastomers with chemically compatible gaskets
- Reassemble to manufacturer torque specifications
Step 4: Test and Return to Service
After any repair, conduct a post-repair pressure or hydrostatic test to confirm all leaks are eliminated before restart. Then run the unit under normal operating conditions and monitor key indicators over a defined observation period:
- Temperature differentials across the exchanger
- Pressure drop stability
- Fluid purity and any evidence of cross-contamination
When to Repair vs. Replace Your Heat Exchanger
The right decision depends on damage severity, unit age, repair cost relative to replacement value, and whether failures are recurring.
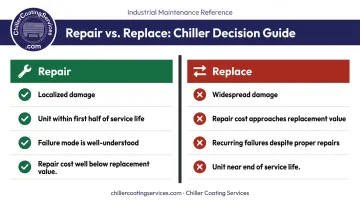
Repair Makes Sense When:
- Damage is localized—isolated tube sheet corrosion, a small number of failed tubes, or a single gasket failure—and the rest of the unit is structurally sound
- The exchanger is within the first half of its service life; repair plus protective coating can add years of reliable service at a fraction of replacement cost
- The failure mode is well-understood and addressable through a specific repair method (retubing, recoating, gasket replacement)
Replace When:
- Damage is widespread across tubes, tube sheets, or shell
- Repair costs approach or exceed replacement value—a widely used benchmark is 50%, though the actual threshold varies by unit type and complexity
- Failures are recurring despite properly executed repairs, suggesting a systemic problem the repair method cannot resolve
- The unit is near end of life and a replacement would offer substantially better efficiency or materials compatibility
Two additional considerations are worth understanding before finalizing any repair-or-replace decision.
On the 10/13 rule: This term circulates frequently in heat exchanger discussions, but its verified engineering definition is an API 521 tube-rupture pressure-relief criterion. It compares low-pressure side design strength with high-pressure side design pressure for relief system sizing—not tube-plugging thresholds or replacement decisions. When evaluating how many plugged tubes make a unit uneconomical, the threshold depends on the specific exchanger design, required capacity, and operating conditions rather than a universal percentage rule.
Safety-critical situations: If the unit handles toxic, pressurized, or contamination-sensitive fluids and structural integrity cannot be confirmed through testing, replacement is non-negotiable.
Preventive Maintenance to Extend Heat Exchanger Life
Prevention consistently costs less than repair. DOE FEMP data shows preventive maintenance saves 12% to 18% over reactive maintenance, and predictive maintenance programs can reduce downtime by 35% to 45%—meaningful numbers when unplanned failures carry significant operational consequences.
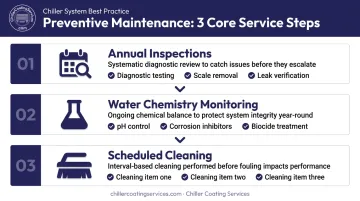
Core Preventive Maintenance Program
Follow these fundamentals:
- Annual inspections with diagnostic testing – ASHRAE Standard 180 specifies annual heat exchanger checks, cleaning as needed to remove scale and sediment, and leak verification for commercial HVAC systems. Industrial plant exchangers warrant external visual inspection at minimum every five years
- Water chemistry monitoring – Maintain proper pH, use corrosion inhibitors, and control microbial growth with chemical biocides to prevent biological fouling and scale formation
- Scheduled cleaning – Clean heat transfer surfaces on a defined interval before fouling becomes performance-limiting; don't wait for efficiency loss to signal the problem
Proactive Tube Sheet Coating as a Maintenance Investment
Applying a protective coating system after cleaning is far more cost-effective than waiting for failure. Chiller Coating Services works with facilities managers at schools, hospitals, office buildings, and manufacturing plants across New England and New York to develop preventive maintenance and recoating schedules. Timing is coordinated around each facility's operational windows to minimize disruption.
Scheduling coatings proactively delivers measurable returns:
- Creates a non-conductive barrier between dissimilar metals, blocking galvanic corrosion before it starts
- Smooth coated surfaces reduce inlet turbulence and limit deposit accumulation, cutting fouling frequency
- Increases thermal conductivity and optimizes flow characteristics for improved efficiency
- Extends service life at a fraction of replacement cost; quick-cure technology keeps downtime to a minimum
Conclusion
Most heat exchanger failures—corrosion, fouling, tube leaks, tube sheet cracking—are repairable when caught before damage becomes widespread. Correct diagnosis comes first; without it, repairs address symptoms rather than causes.
The repair-vs.-replace decision belongs in a cost analysis, not a default assumption. Professionally executed repairs with protective coatings regularly add years of reliable service to equipment that most facilities managers would otherwise replace prematurely. The key variables are damage scope, unit age, and whether the repair method genuinely addresses the failure mechanism.
That framework applies directly to the aging chiller systems, heat exchangers, and water boxes common across New England and New York facilities. Chiller Coating Services brings over 40 years of management experience in industrial coatings and surface restoration—covering inspections, corrosion repair, and proprietary coating applications that reduce fouling, prevent galvanic corrosion, and extend equipment service life. Call (877) 427-0090 to discuss your facility's specific situation.
Frequently Asked Questions
Can a heat exchanger be repaired?
Yes. Most heat exchangers can be repaired, particularly for localized corrosion, tube failures, fouling, and gasket issues. Cleaning, tube plugging, retubing, and protective coatings are all proven methods. Widespread or recurring damage is the primary indicator that replacement may be more cost-effective than continued repair.
How can you tell if a heat exchanger is failing?
Key warning signs include reduced system efficiency, higher-than-normal operating temperatures, increased energy consumption, fluid leaks or cross-contamination between streams, visible corrosion or pitting on the tube sheet, and unexplained pressure drop across the unit.
How much does it cost to repair a heat exchanger?
Costs vary based on exchanger size, damage type, and whether retubing or recoating is required. Cleaning and tube plugging are the lowest-cost interventions; full retubing costs more but is still less than new unit procurement. Early intervention consistently costs less than deferred repair.
What is the 10/13 rule for heat exchangers?
The 10/13 rule is an API 521 criterion for tube-rupture pressure-relief design, relating the low-pressure side design strength to the high-pressure side design pressure for relief system sizing. It is not a tube-plugging percentage or replacement threshold, despite occasional informal misuse of the term.
How long does a heat exchanger repair last?
Durability depends primarily on surface preparation quality, materials used, and whether a protective coating was applied. A professionally executed repair with proper blasting to white metal finish and an industrial-grade 100% solids coating system can restore reliable service life measured in years, not months.
What causes heat exchanger tube sheet damage?
The primary causes are galvanic corrosion from dissimilar metals, erosion at tube inlets from high-velocity flow, and thermal cycling stress over years of operation. Without protective coatings, bare metal stays continuously exposed to oxygenated water and chemical treatments, accelerating deterioration.