Heat exchanger damage isn't a question of if, but when. According to ARC Advisory Group, unplanned downtime costs the global industrial and manufacturing sector over $1 trillion per year in lost revenue — and degraded heat exchangers are a frequent contributor.
This guide covers how to recognise damage early, diagnose root causes accurately, execute a proper step-by-step repair and restoration, and make the right call on repair versus replacement.
Key Takeaways
- Corrosion, fouling, thermal stress, and erosion are the leading causes of heat exchanger failure — often working together
- Early-stage damage can often be fully restored without replacement
- Effective repair follows four steps: diagnosis, white-metal surface prep, structural rebuilding if needed, and a protective coating
- Call a professional when damage is structural, a safety risk is present, or your team lacks blast equipment and coatings expertise
What Is a Heat Exchanger?
A heat exchanger transfers thermal energy between two fluid streams without mixing them. In industrial and HVAC systems — particularly chillers, condensers, and cooling systems — they are the mechanism that keeps process temperatures within operating limits.
These systems operate under constant stress. Temperature cycling, fluid chemistry, and mechanical pressure work against tube sheets, tubes, and joints every hour the equipment runs. That wear is predictable — and without regular maintenance, so is the damage.
Common Signs and Root Causes of Heat Exchanger Damage
Most failures follow recognisable patterns. Identifying the symptom first helps trace back to the root cause. Without this diagnostic step, you risk fixing the wrong problem entirely.
Symptoms to Watch For
- Reduced heat transfer efficiency or unexplained increases in energy consumption
- Visible corrosion, pitting, or discoloration on tube sheet faces
- Fluid leaks or cross-contamination between process streams, or coolant loss
- Unusual noises — vibration, hammering, or cavitation sounds during operation
A critical point: many problems begin silently. A 2019 refinery fouling analysis estimated US$1.0B–$1.2B per year in US crude preheat-train fouling costs, with duty dropping measurably before any visible failure appears. Performance trending — monitoring approach temperatures and pressure differentials — catches problems before they become structural.
Root Causes Behind the Damage
| Root Cause | Mechanism |
|---|---|
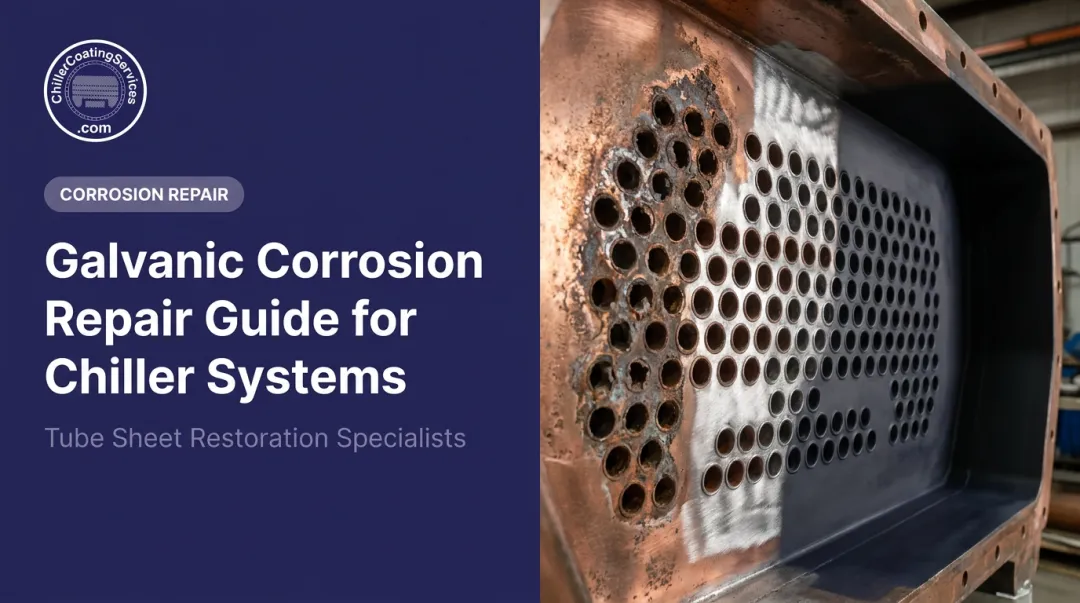
| Galvanic/electrolytic corrosion | Dissimilar metals (for example, copper tubes paired with a steel tube sheet) in conductive water form a galvanic cell — the more active metal corrodes preferentially |
| Thermal fatigue | Repeated expansion and contraction cycles cause micro-cracking at welds and joints over time |
| Erosion | High-velocity fluid flow and suspended particles attack tube inlets and water box nozzles |
| Fouling and scaling | Biofilm and scale act as insulation, accelerating localized overheating and corrosion beneath deposits |
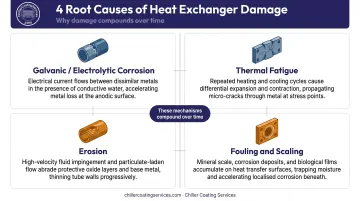
These mechanisms compound over time. Fouling accelerates corrosion, corrosion weakens joints, and leaking joints trigger cross-contamination, unplanned shutdowns, and structural compromise of tube sheet ligaments.
How to Repair and Restore a Damaged Heat Exchanger
Attempting a repair without first confirming the root cause and extent of damage is the most common and costly mistake. This step-by-step process ensures the right fix is applied.
Step 1: Isolate and Prepare the Unit Safely
Before any inspection or work begins:
- Shut down completely and follow your facility's lockout/tagout (LOTO) procedures
- Close all fluid valves, drain the system, and allow full depressurization and cooling
- Plug or cap tube ends to prevent contamination and debris from entering the bundle during surface work
No shortcuts — pressurized or hot equipment creates serious risk.
Step 2: Inspect and Diagnose the Damage
Conduct a thorough visual inspection using adequate lighting. Look for:
- Pitting and cracking on the tube sheet face
- Erosion at tube inlets and inlet-side tube ends
- Ligament damage between tube holes
- Fluid staining, leakage tracks, or discoloration
Visual inspection alone isn't enough. Match your non-destructive testing method to the damage type:
| NDT Method | Best For |
|---|---|
| Dye penetrant testing | Surface cracks and fine ligament cracks |
| Hydrostatic pressure testing | Confirming leak-tightness across the tube bundle |
| Eddy current inspection | Wall thinning, pitting, and defects in individual tubes |
| Ultrasonic thickness measurement | Measuring remaining wall thickness in tubes and tube sheets |
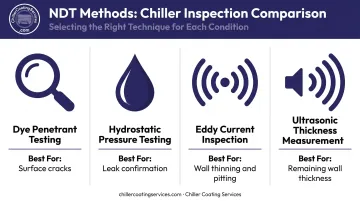
Document the location, size, and severity of all damage before proceeding. This informs both the repair scope and material selection.
Step 3: Prepare the Surface
Surface preparation is where most repair failures actually begin. Poor prep leads to poor coating adhesion — and a coating applied over inadequate prep will fail far sooner than the underlying damage would have.
The required standard: abrasive blast-clean to a white metal finish equivalent to SSPC-SP 5 / NACE No. 1. This standard requires surfaces to be free of all visible oil, grease, dust, dirt, mill scale, rust, coatings, oxides, and corrosion products when viewed without magnification. It is the benchmark for severe immersion service.
After blasting, degrease the surface using an appropriate solvent cleaner to remove residual oils and blast media. Skipping this step is one of the most consistent causes of premature coating failure — contamination under a freshly applied coating breaks the adhesive bond within months, not years.
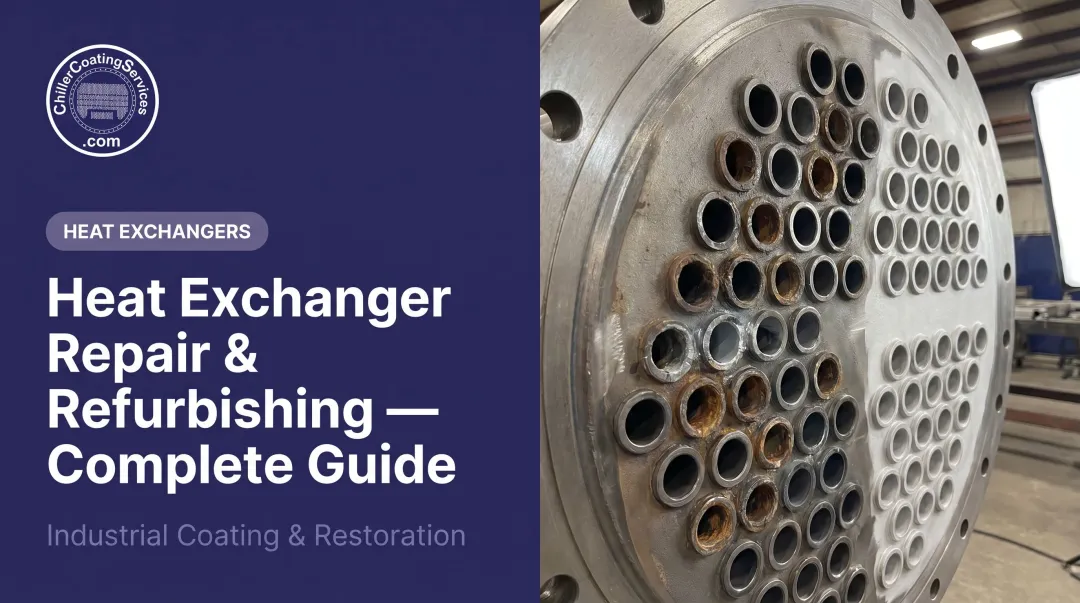
Chiller Coating Services performs contained abrasive blasting to this standard across tube sheets, tube ends, water box interiors, and accessible heat exchanger internals. The containment system is designed for occupied facilities — hospitals, data centers, and manufacturing plants — where uncontrolled blast media is not an option.
Step 4: Rebuild Damaged Areas and Apply a Protective Coating
Rebuilding pitted and eroded surfaces:
For tube sheet faces with significant material loss, apply a compatible metal repair composite or epoxy-based rebuild material to restore the original surface profile. In critically eroded zones, reinforcement mesh restores structural integrity before the coating layer goes down.
Coating alone cannot compensate for lost structural metal. Corroded areas must be rebuilt first — otherwise the coating fails and joints continue to deteriorate.
Applying the protective coating system:
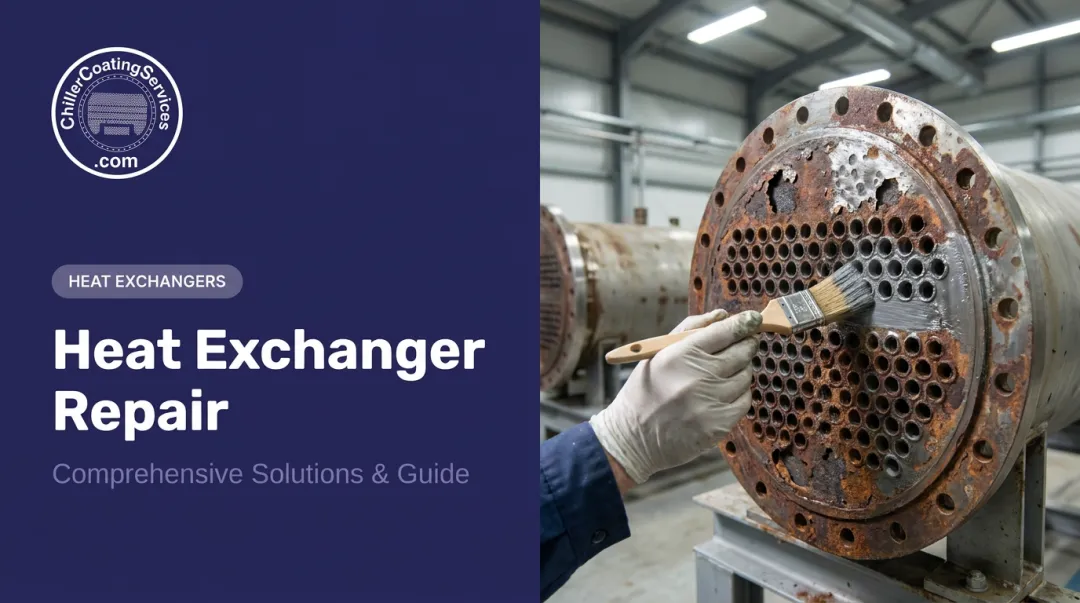
Apply a specifically formulated 100% solids protective coating system across the full tube sheet face in two even coats. The coating system must meet these performance requirements:
- Bond durably to corrosion-prone metal surfaces following white metal blast preparation
- Withstand long-term immersion in process fluid chemistry
- Provide electrical insulation to prevent galvanic corrosion between dissimilar metals — this is the mechanism that breaks the electrolytic circuit between copper tubes and steel tube sheets
- Reduce inlet turbulence to improve flow efficiency and reduce erosion
Chiller Coating Services applies proprietary 100% solids coatings engineered to meet these requirements, with quick-cure technology that minimizes downtime. In some cases, the coating increases tube-to-tube-sheet push-out strength by over 1,000 pounds — a structural reinforcement outcome, not just a corrosion barrier.
For tube-related damage beyond the tube sheet face, additional repair options include:
- Tube plugging — isolating individual failed tubes to restore pressure integrity
- Tube sleeving — reinforcing weakened tube sections from the inside
- Full tube replacement — for extensive or widespread tube failure
Step 5: Test and Return to Service
After cure, verify the repair before returning the unit to service:
- Pressure or hydrostatic testing to confirm no leaks are present across the tube bundle
- Visual coating inspection for holidays, pinholes, or disbondment — address any defects before reassembly
- Coating thickness measurement using ultrasonic or magnetic gauges to verify specified build is achieved
Once back in service, monitor performance over the first operational period: check heat transfer output, approach temperatures, pressure differentials, and look for any early signs of recurrence.
Fix vs. Replace: How to Make the Right Decision
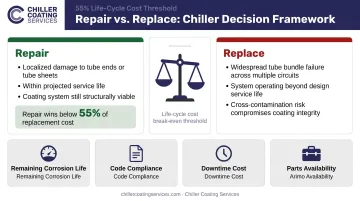
Repair is almost always the preferred choice when damage is identified before it becomes structural. Replacement becomes necessary under specific conditions that make further repair unviable.
Repair When:
- Corrosion or erosion is localized to the tube sheet face or inlet zones and base metal is structurally sound
- The unit is within its expected service life and performance efficiency remains recoverable
- Protective coating restoration can be completed with minimal downtime and will pay for itself in extended service life
Replace When:
- A large percentage of tubes have failed, tube sheet ligaments are cracked through, or the shell and structural headers are severely compromised
- The unit is beyond its design life, is no longer manufactured, or parts are unavailable
- Active refrigerant-water cross-contamination has occurred and requires full bundle replacement
On the economics: Life-cycle cost analysis from Reliabilityweb puts the break-even rebuild threshold at approximately 55% of new purchase and installation cost — below that, repair typically wins on ROI. When running the numbers, factor in:
- Remaining corrosion life and projected degradation rate
- Code compliance requirements and whether the repaired unit qualifies
- Downtime exposure cost during repair vs. full replacement
- Parts availability if the unit is no longer manufactured
Preventive Measures to Avoid Future Heat Exchanger Damage
The cost argument for prevention is straightforward. Deloitte estimates unplanned downtime costs industries $50 billion per year — and scheduled maintenance costs a fraction of that.
Practical preventive actions:
- Schedule regular inspections at minimum annually for high-duty units, and more frequently in chemically aggressive service environments
- Monitor and treat water chemistry to reduce scaling, biological growth, and corrosive conditions — especially on condenser-side components exposed to open-loop condenser water
- Maintain design flow rates to avoid erosion at tube inlets and vibration-induced fatigue
A 2015 OECD analysis of 46 heat exchanger common-cause failure events found that 57% were detected during scheduled testing or maintenance, confirming that inspection-driven programs catch problems before they escalate into failures.
The most cost-effective strategy is applying a protective coating as part of planned maintenance, not as an emergency repair. A proactively coated tube sheet resists corrosion, reduces fouling, improves thermal efficiency, and significantly extends service life between major interventions.
Facilities that schedule coating during planned shoulder-season outages avoid the compounded costs of emergency mobilization, refrigerant cross-contamination events, and unplanned production downtime.
Frequently Asked Questions
What are the symptoms of a damaged heat exchanger?
The most common indicators are reduced heat transfer efficiency, visible corrosion or pitting on the tube sheet face, fluid leaks or cross-contamination between process streams, increased energy consumption, and unusual vibration or noise during operation. Many problems begin as performance degradation before any visible failure appears.
Can a heat exchanger be repaired instead of replaced?
Yes. Most heat exchangers — including those with significant tube sheet corrosion or erosion — can be repaired and fully restored using epoxy composites and protective coating systems. The key condition is that the unit's structural integrity is still sound and damage hasn't progressed to widespread tube failure or shell compromise.
What causes tube sheet corrosion in heat exchangers?
Galvanic and electrolytic corrosion between dissimilar metals is the most common cause — for example, copper tubes meeting a carbon steel tube sheet with no non-conductive barrier between them. Aggressive water chemistry, poor water treatment, and the absence of a protective coating all accelerate the process.
How long does a repaired or restored heat exchanger last?
Longevity depends on the quality of surface preparation, the coating system used, and subsequent maintenance practices. Tube sheets blasted to white metal finish and coated with a properly formulated 100% solids system can remain in reliable service for a decade or more. Surface preparation is the deciding factor — it's where long-term durability is either built in or compromised.
How often should a heat exchanger be inspected?
At least annually for most industrial applications, with more frequent checks in high-duty or chemically aggressive service environments. Early-stage corrosion caught during routine inspection is far cheaper to address than damage discovered during an unplanned failure or emergency shutdown.
When should I call a professional for heat exchanger repair?
Bring in a professional when damage involves structural components, when in-house teams lack contained blast equipment or 100% solids coating expertise, or when safety or contamination risk is present. Chiller Coating Services provides engineering-led crews, proprietary coating systems, and compliance documentation supporting Joint Commission, CMS, ISO, FDA, NERC, and SOC 2 requirements.